Students from the Energy Club went to France for a practical workshop. They came back with a working wind turbine that they now want to install somewhere on campus.

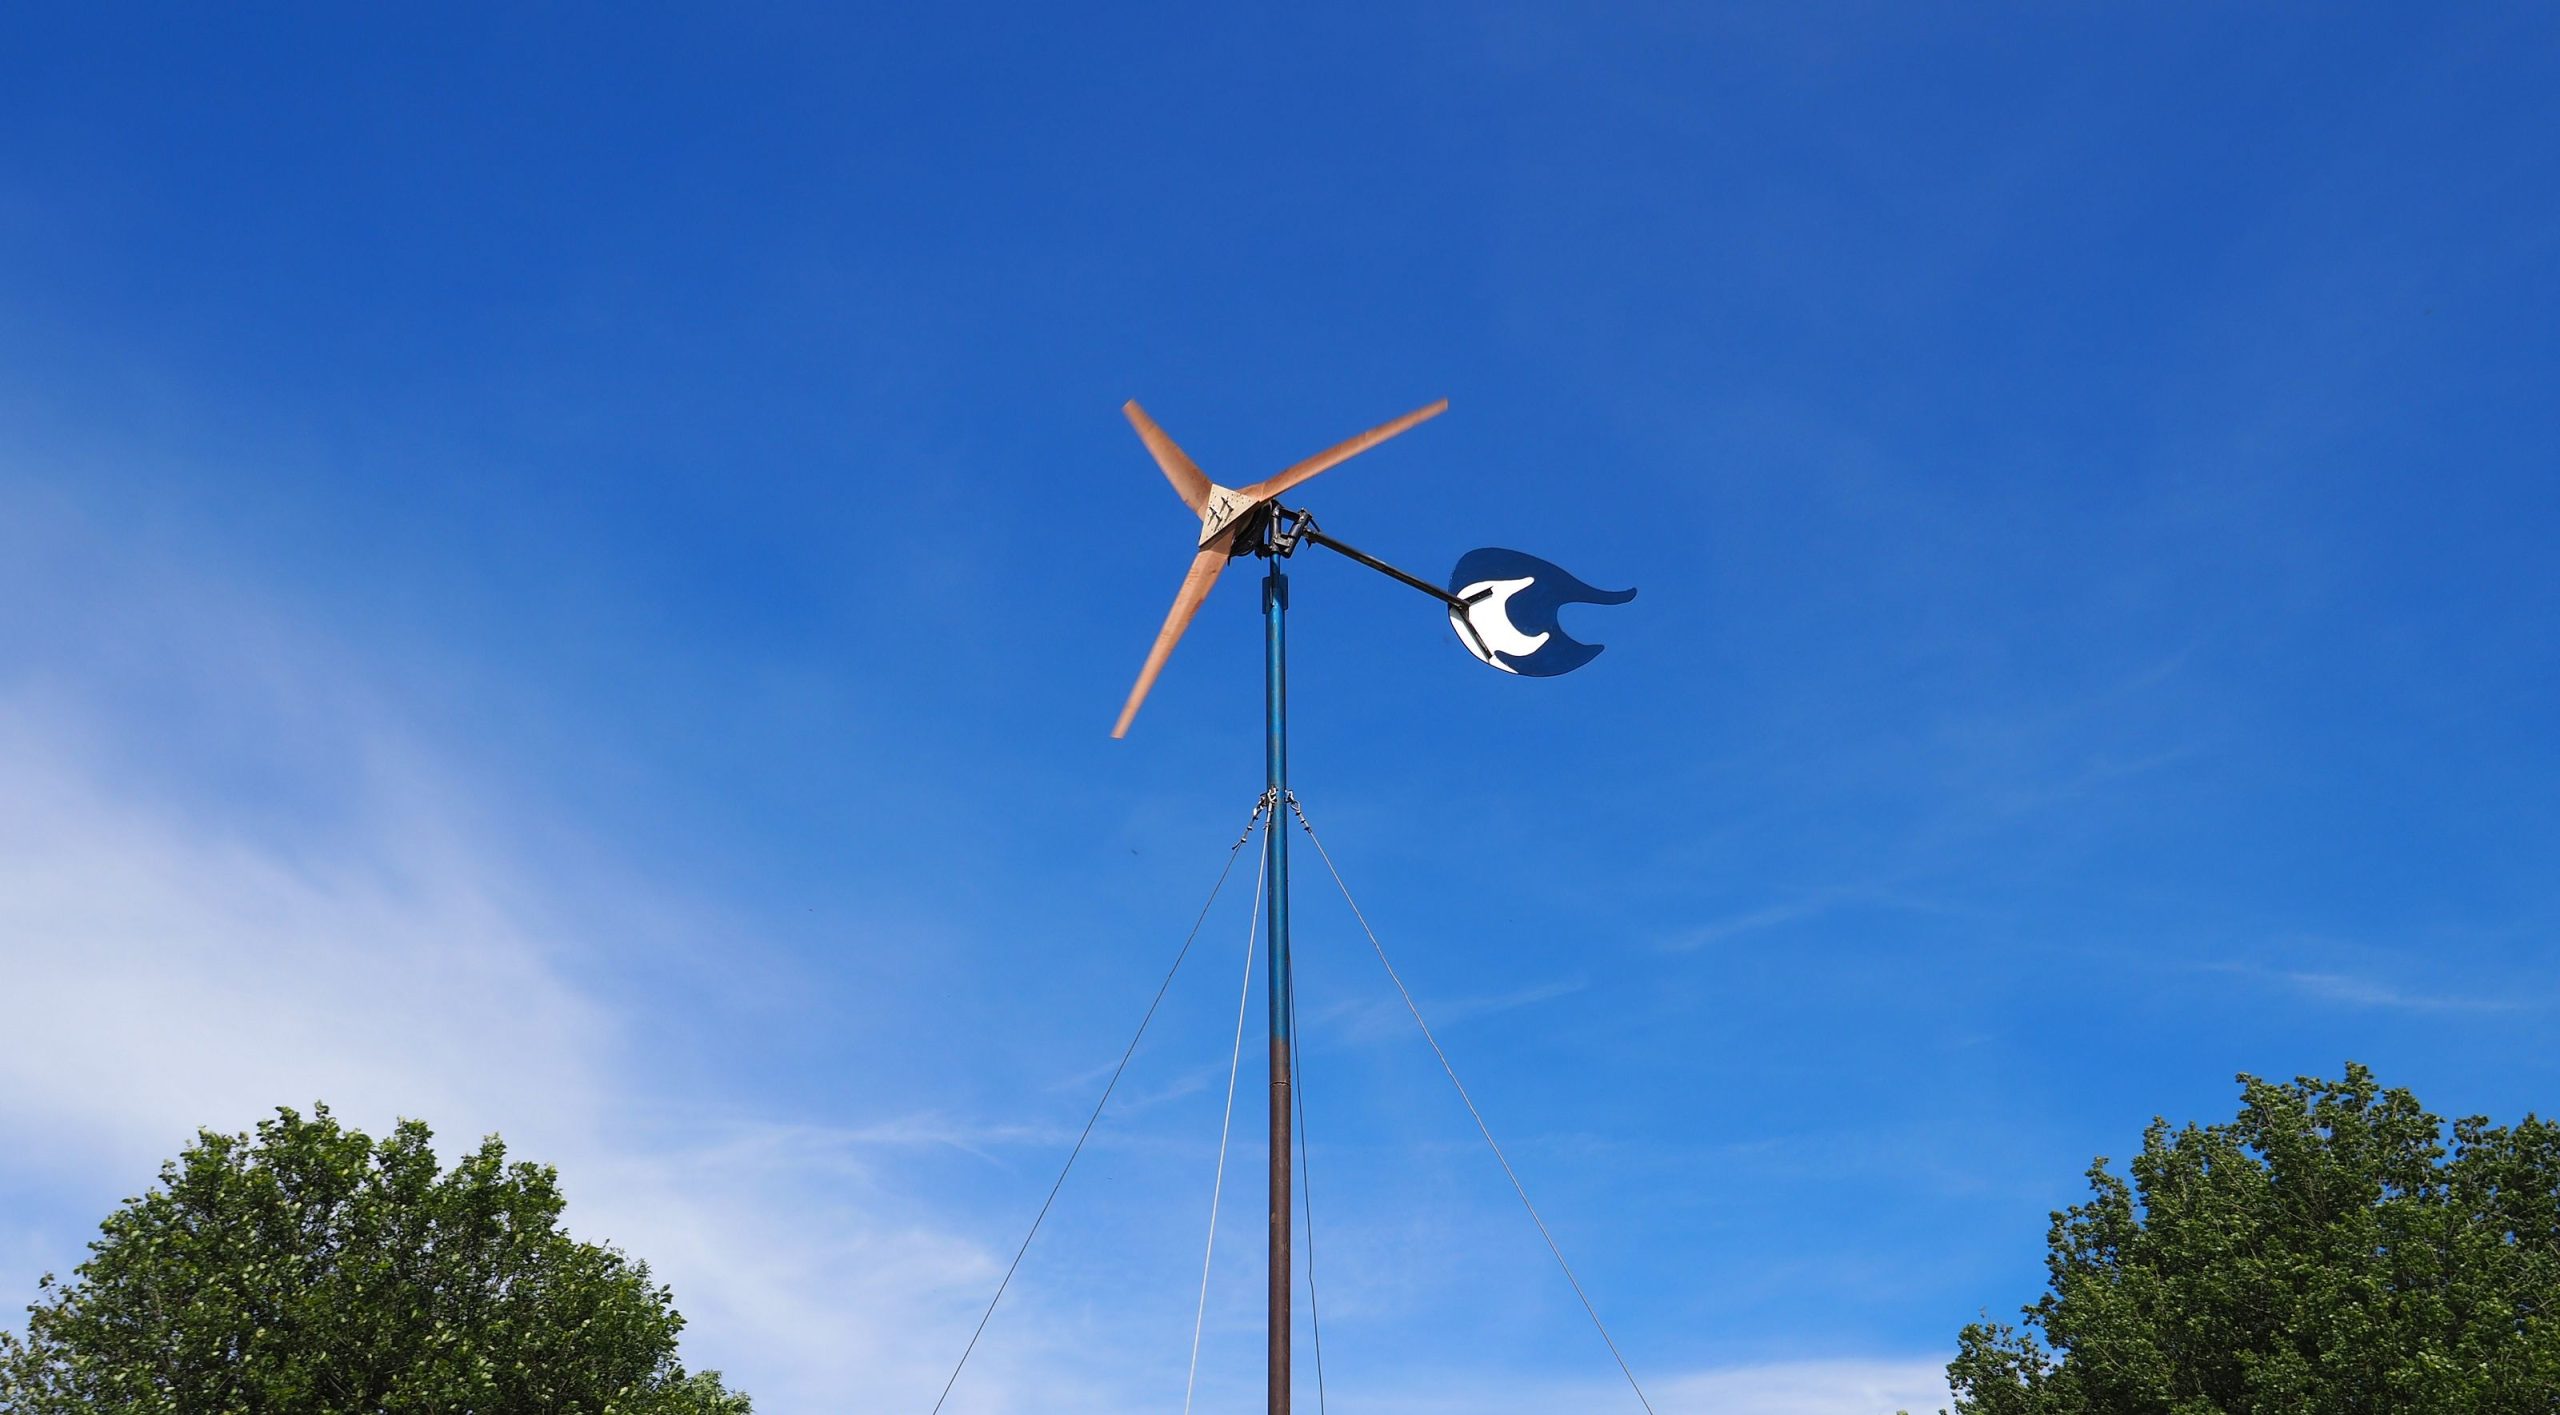
Their wind turbine has a 2.4-metre diameter and delivers a maximum power of about 700 watts to the grid. They followed the design by the Scottish designer Hugh Piggot, who wrote the Wind Turbine Recipe Handbook. The 26 students (all except one from TU Delft) rotated over three workshops (wood work, metal workshop, and electrical engineering) during five days. On the last day, the assemblage was put on a mast and hoisted into the air. “It’s strange to see that something you made with your own hands, when all comes together, actually produces energy,” said Natalia Aleksandrova, a master student from Russia at Sustainable Energy Technology who joined the workshop. She explained how to make a wind turbine in seven steps.
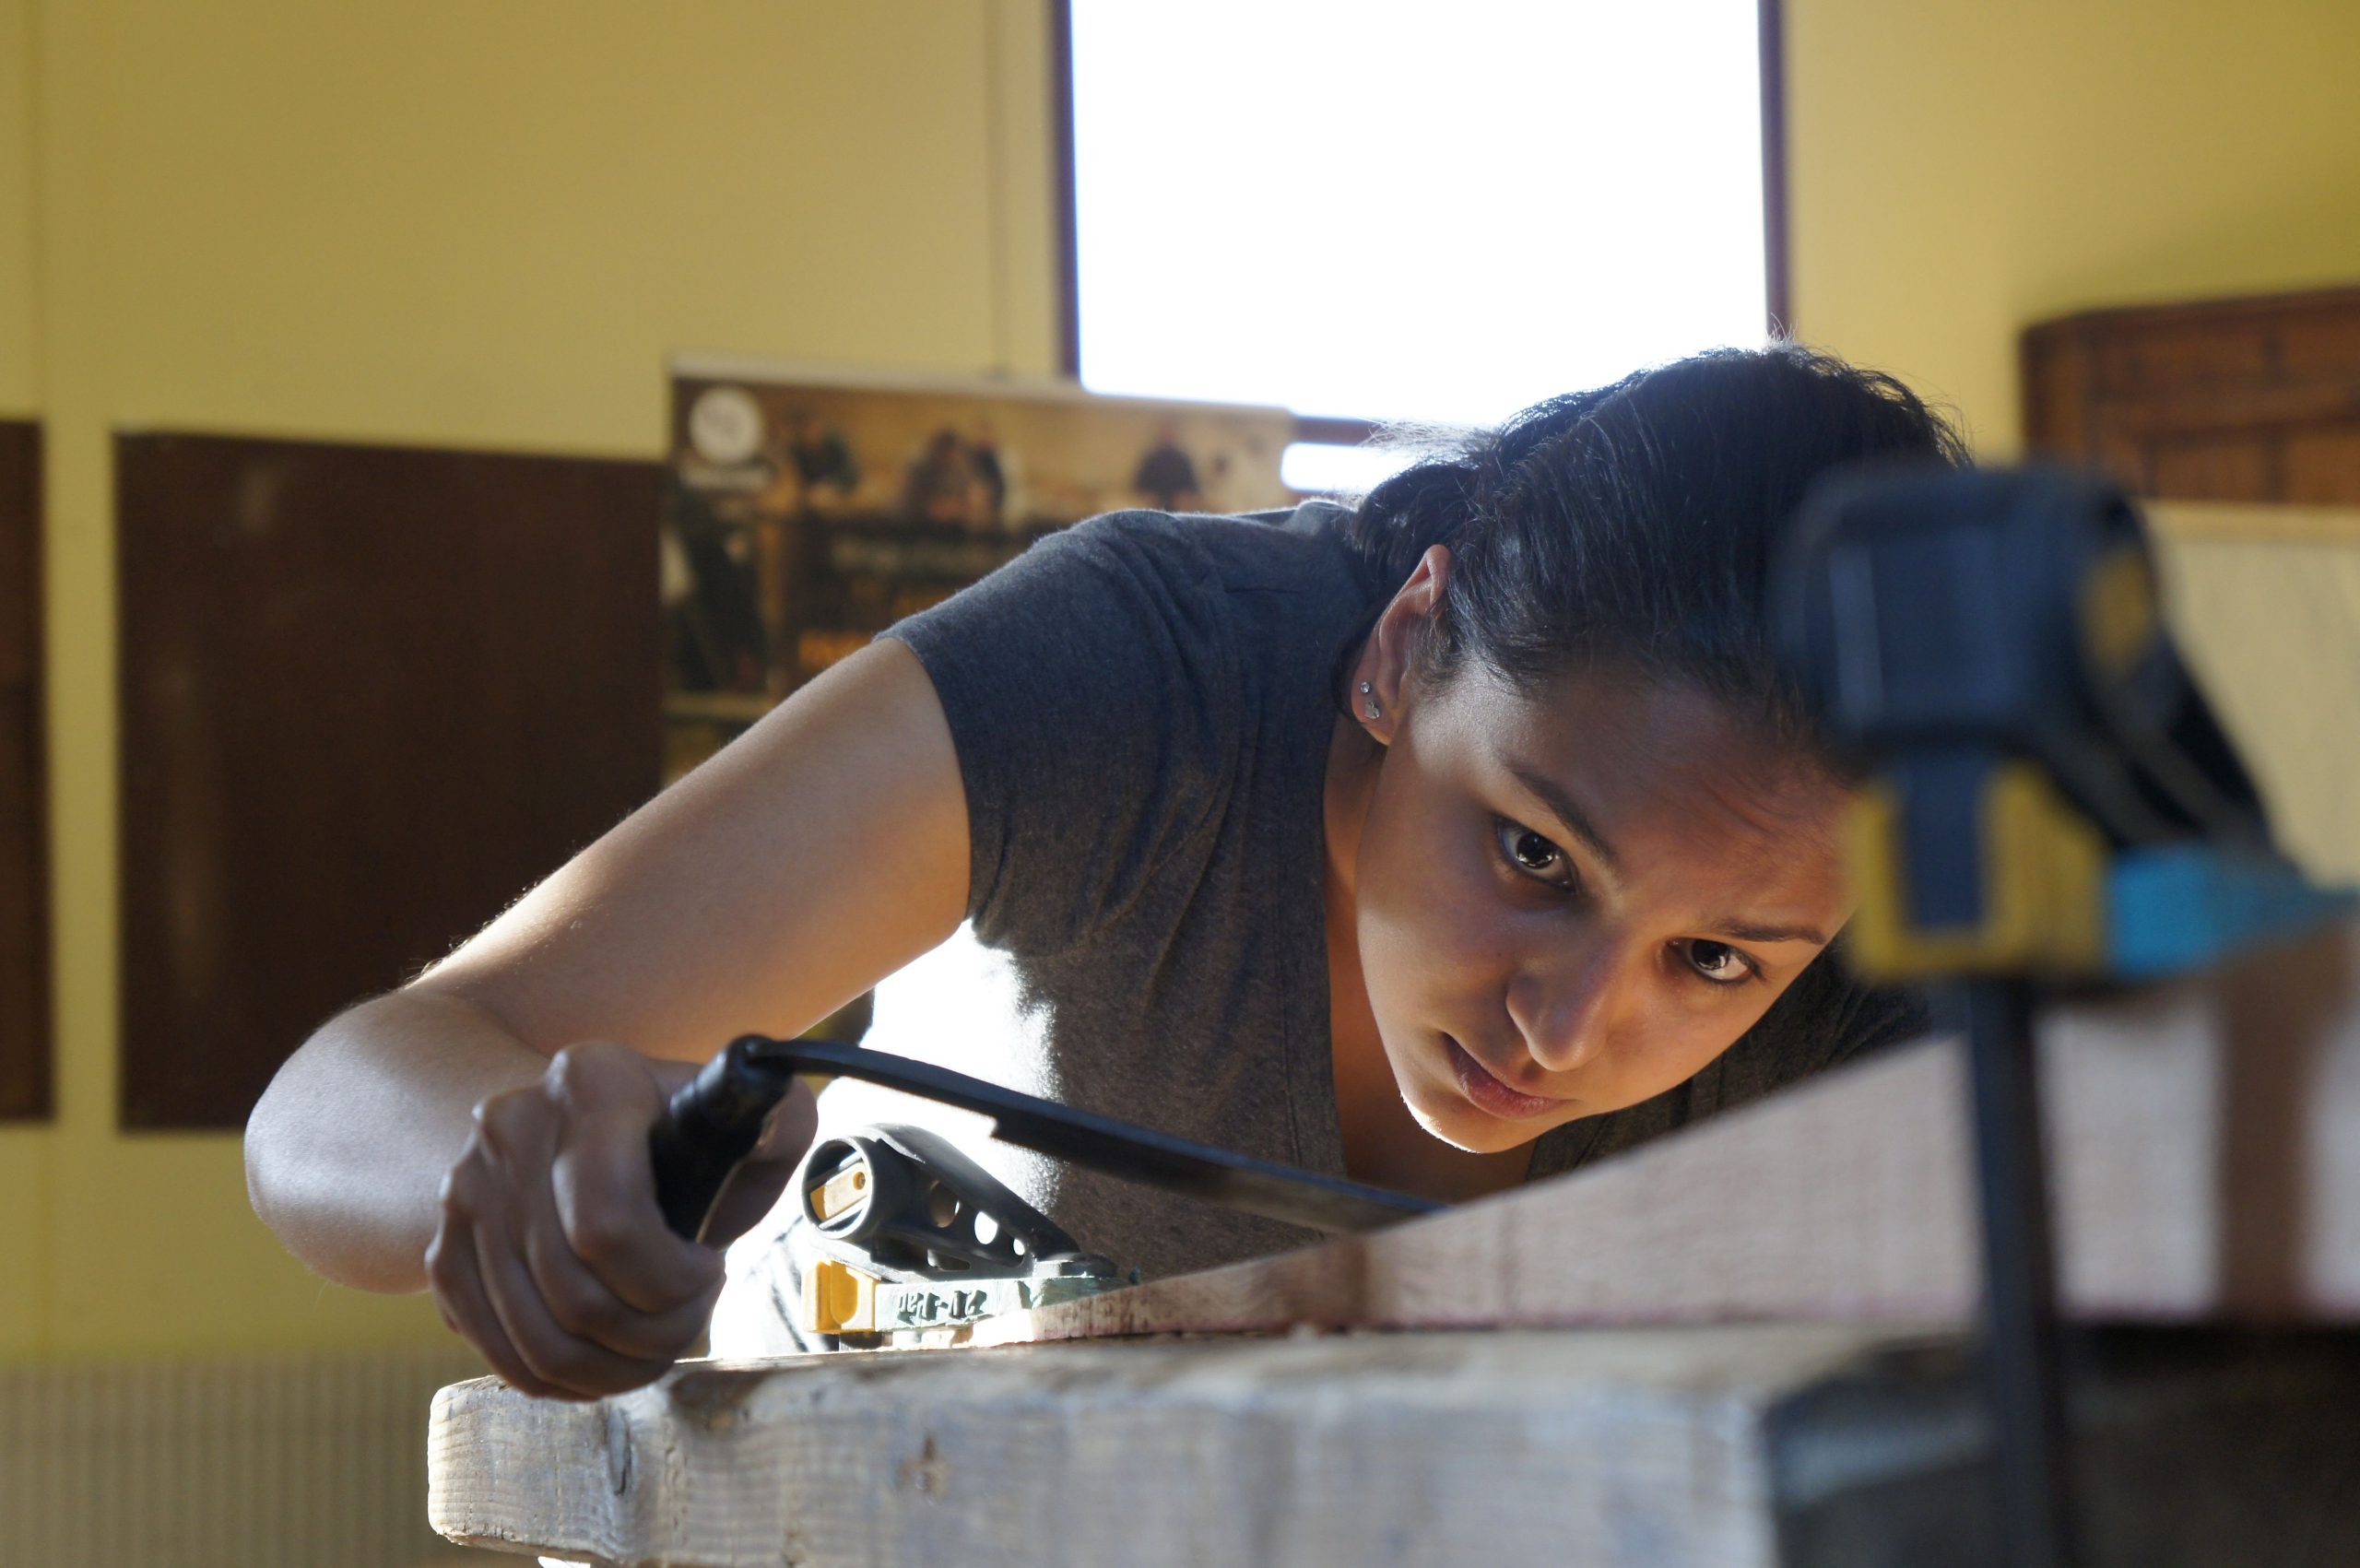 Blades
Blades
Blades
Cutting, sculpting, and shaving down the blades is perhaps the most time-consuming part of the process. Students worked in pairs four days long to get them into an aerofoil shape. What starts out as a red oak board gets cut thinner and narrower until the right shape emerges. What follows are hours of shaving to make it smooth.
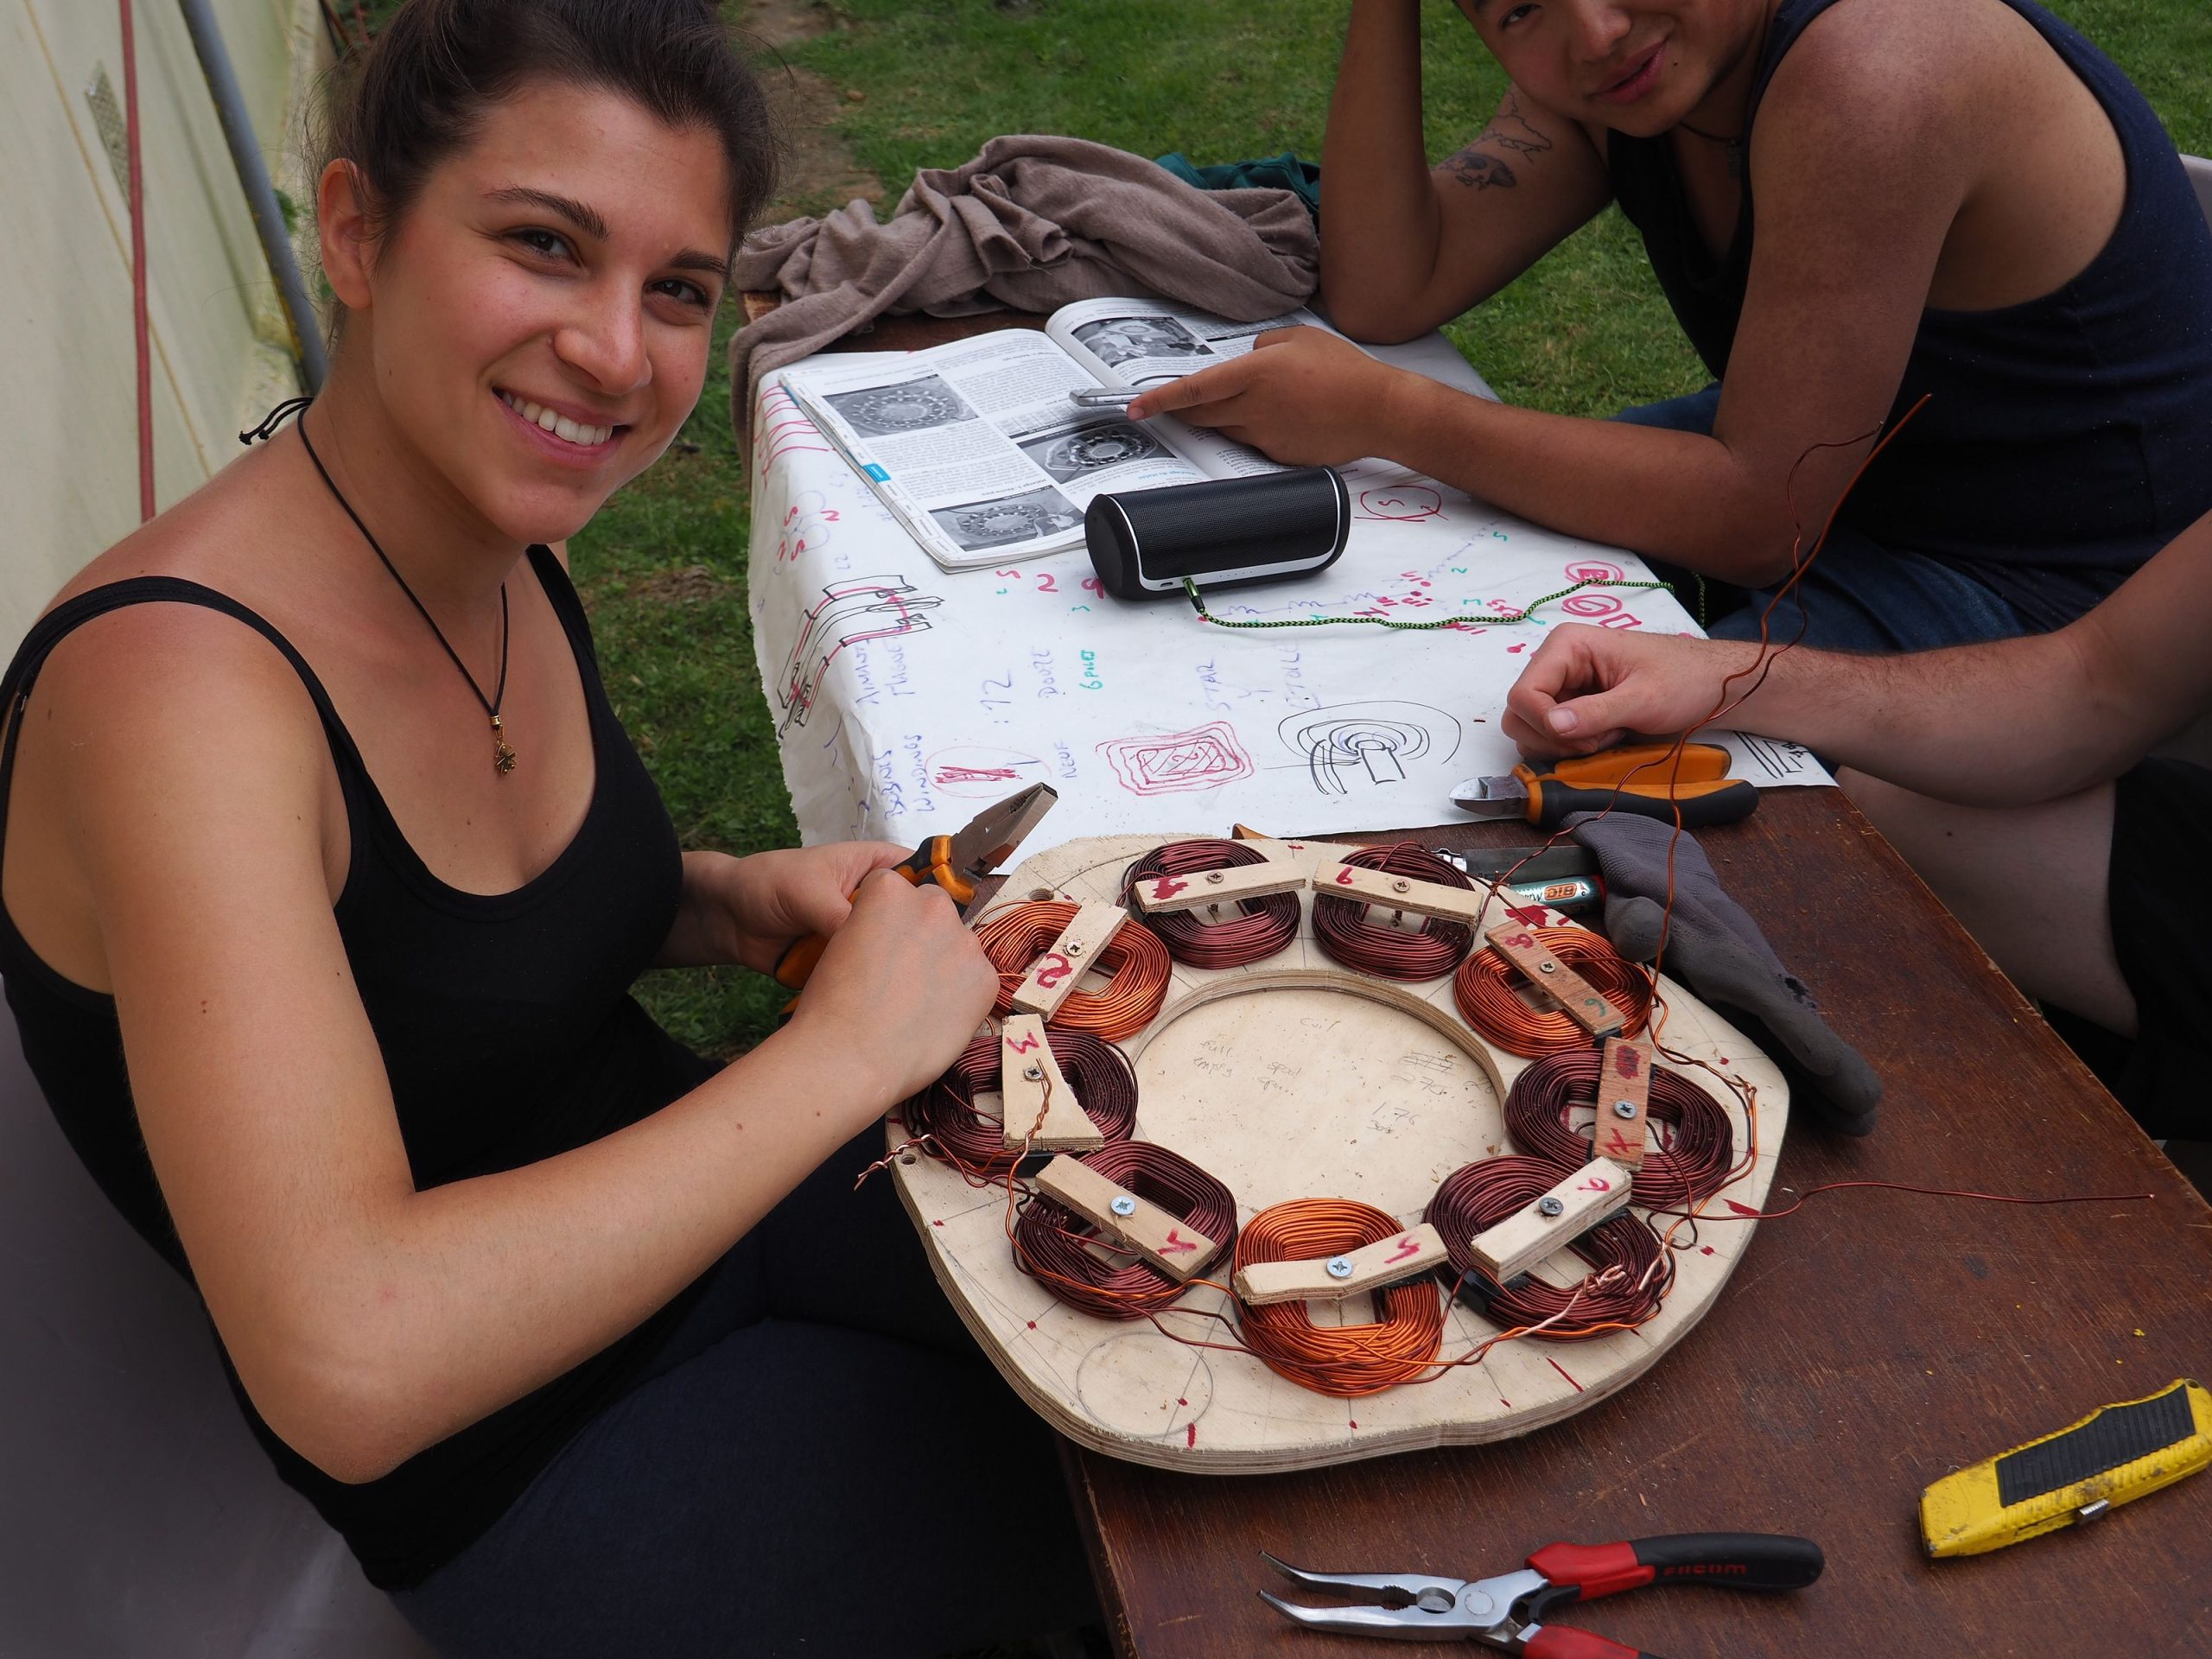 Stator
Stator
Stator
Nine coils are made from copper wire, using a custom-made spindle and counting for 90 turns each. Next, they are connected correctly, geometrically placed and fixed with resin in a mould.
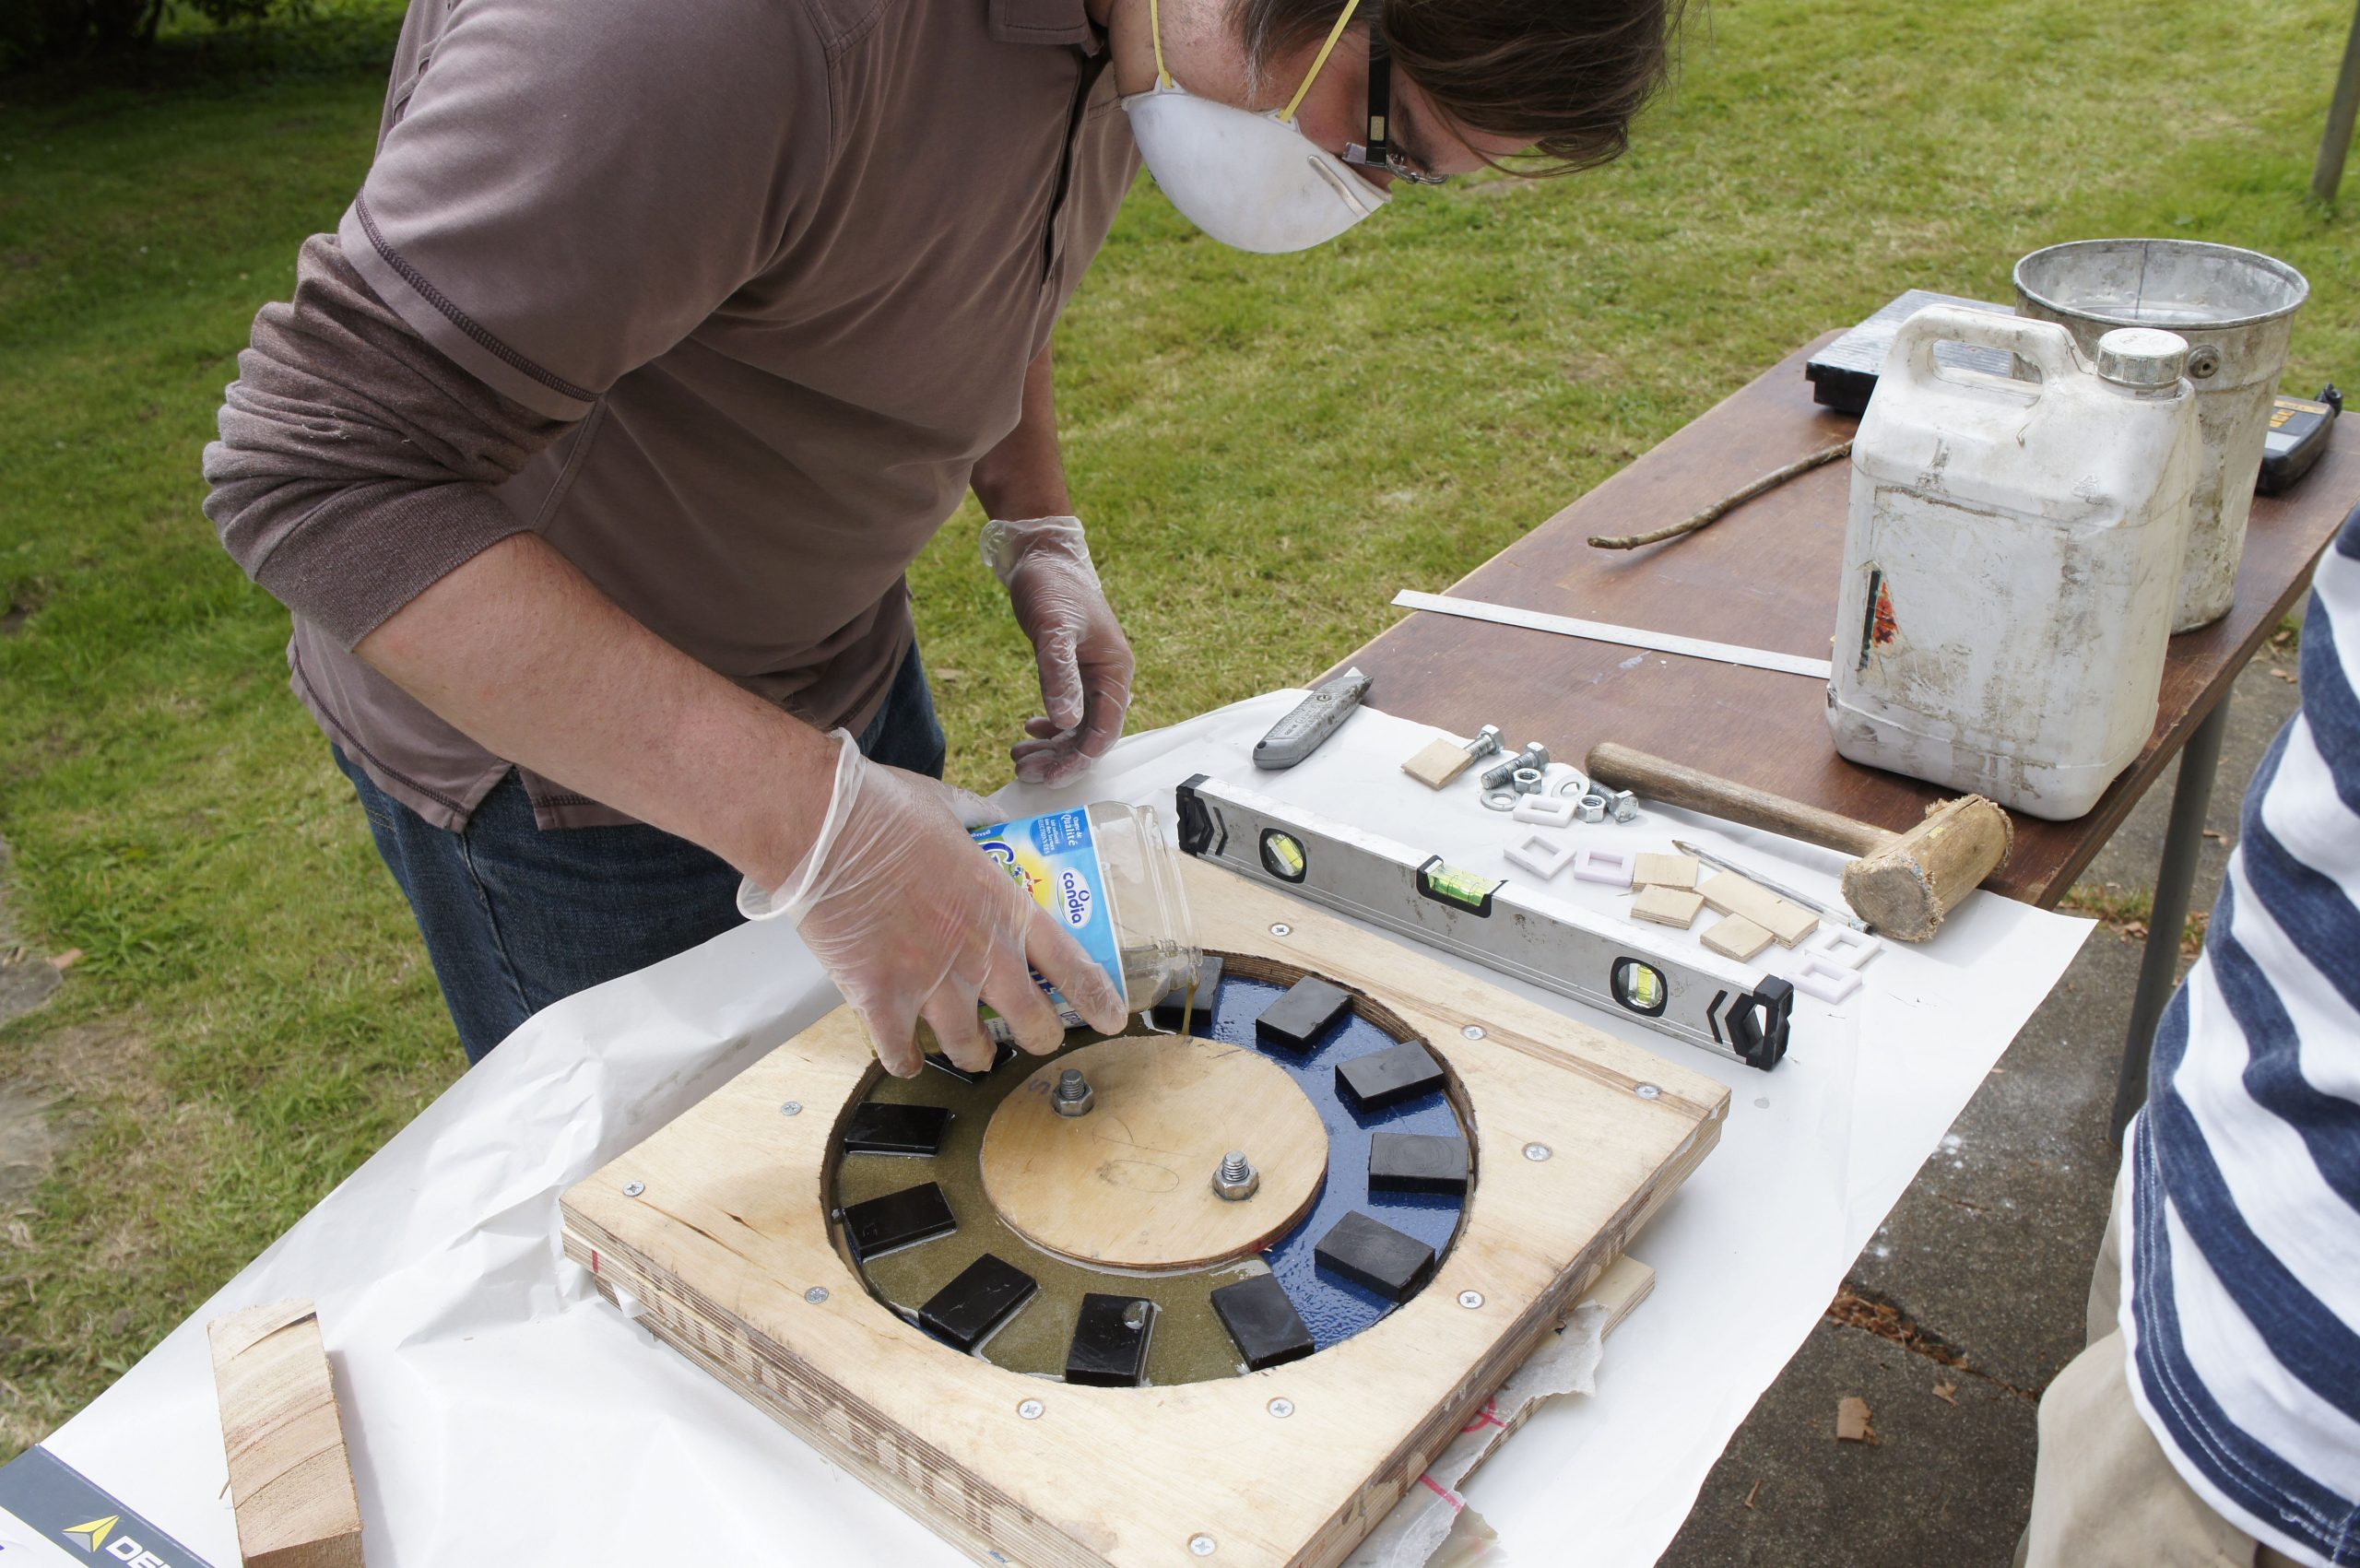 Rotor
RotorRotor
Rotor
Twelve ultra-strong neodymium magnets will generate the rotating magnetic field. A temporary wooden mould is used to put them in the right position on a metal disk. Once all the magnets are in place, these too are fixed with resin.
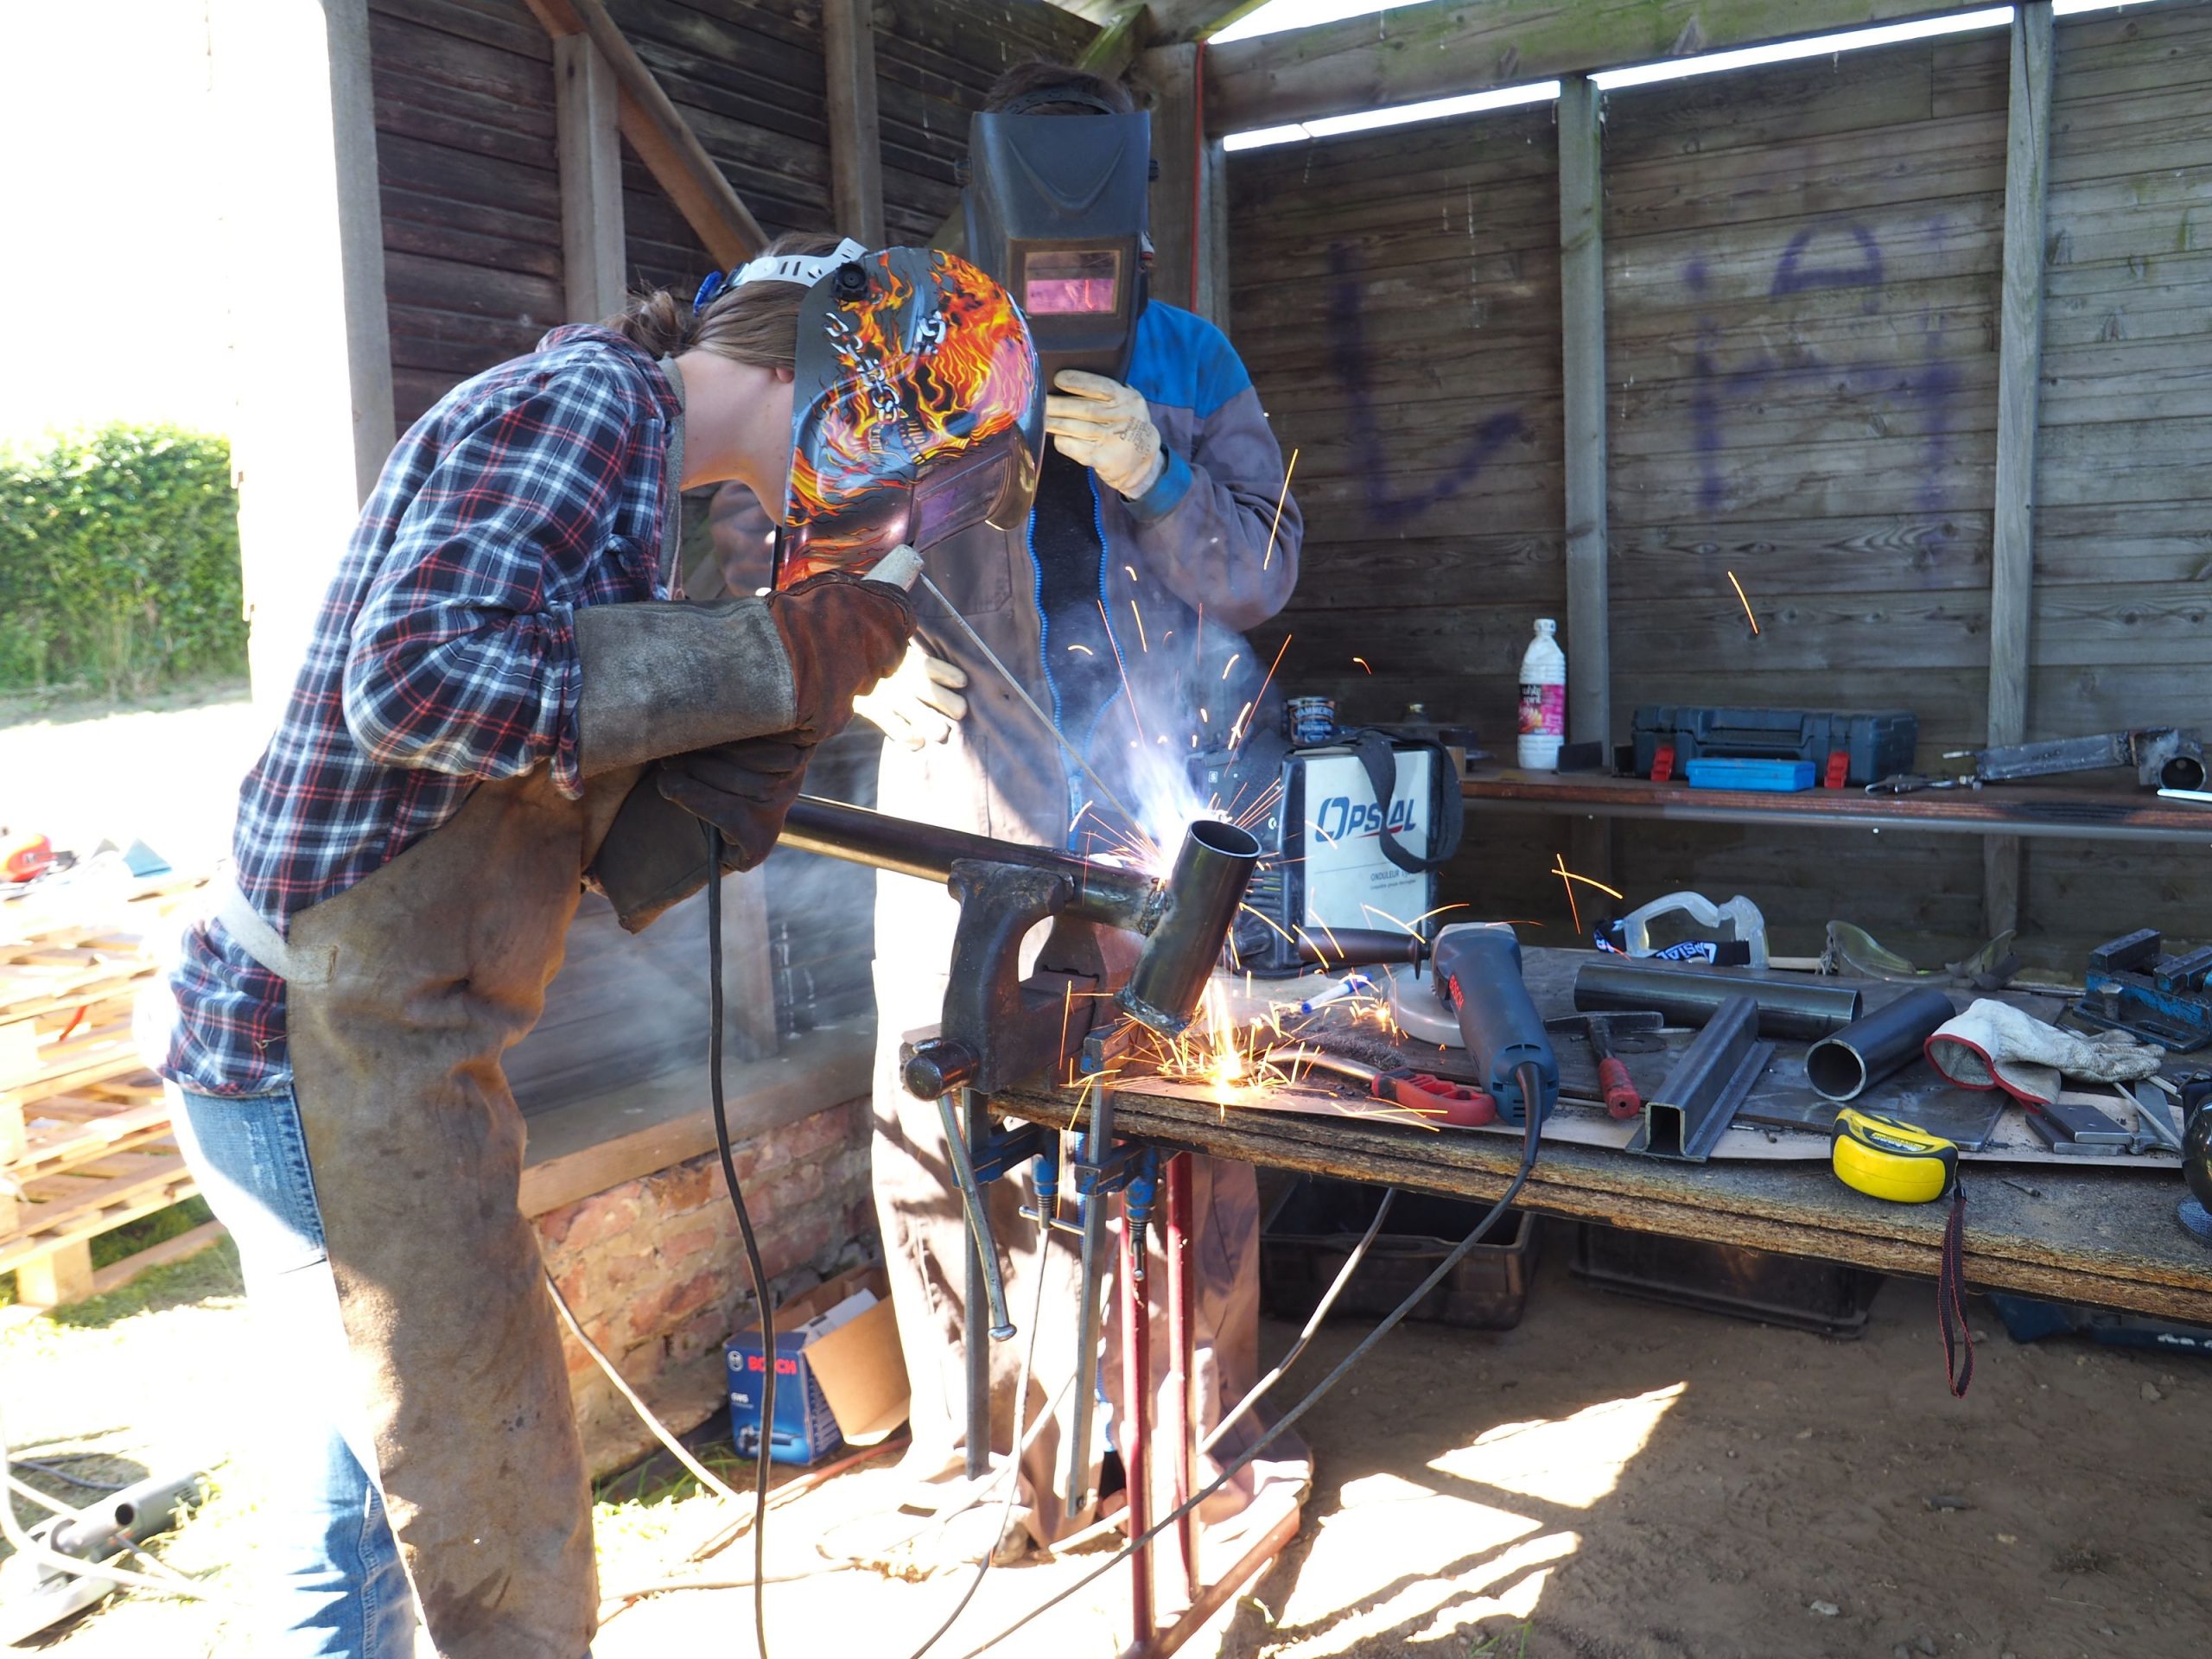 Frame
FrameFrame
Frame
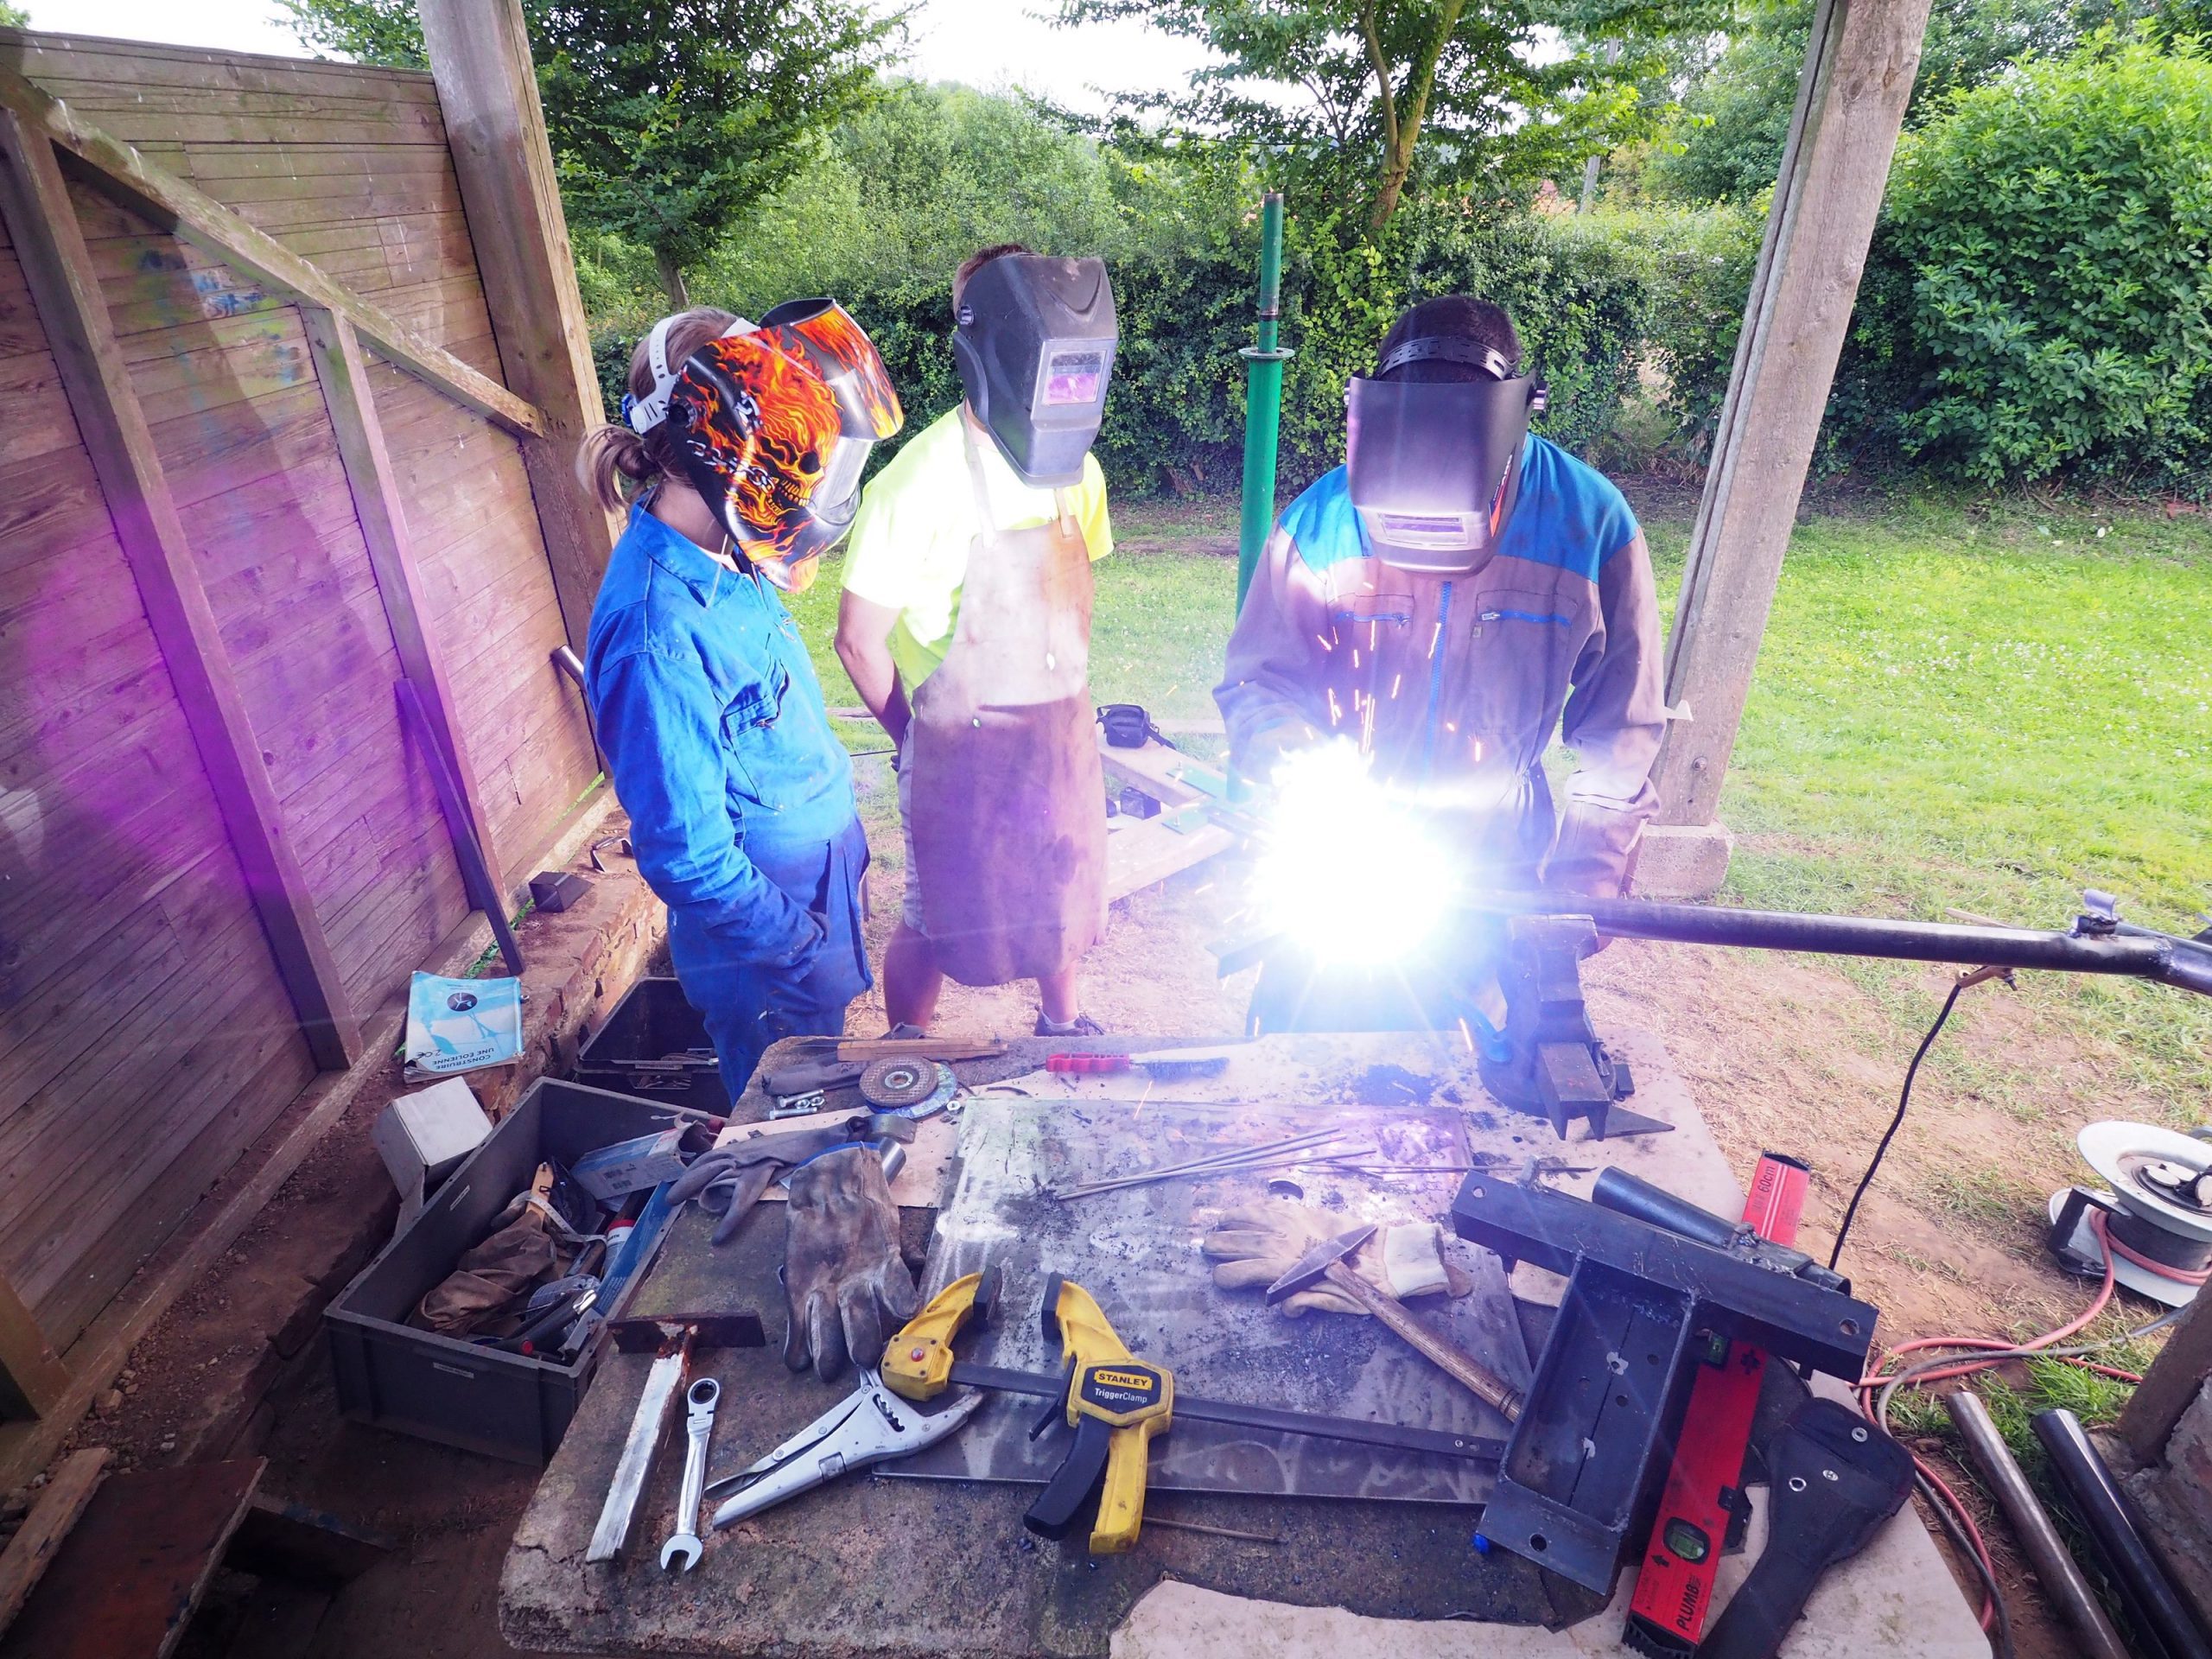
Metal profiles and pipes are cut with grinders and welded together to make a frame that carries the stator and the tail on top of the mast.
 Tail
TailTail
Tail
Not only does the tail direct the rotor into the wind, but it is also the safety break. Thanks to a clever mechanism, the tail folds back behind the blades when the wind becomes too strong. In doing so, it aligns the rotor with the wind and takes away the pressure. The students decorated the tail with Prometheus’ flame as a salute to TU Delft.
 Assembly
Assembly
Assembly
On the fifth day, everything came together: blades, rotor, stator, frame, and tail. A delicate procedure followed in which the students used tiny pieces of metal to balance the blades.
 Hoisting
Hoisting
Hoisting
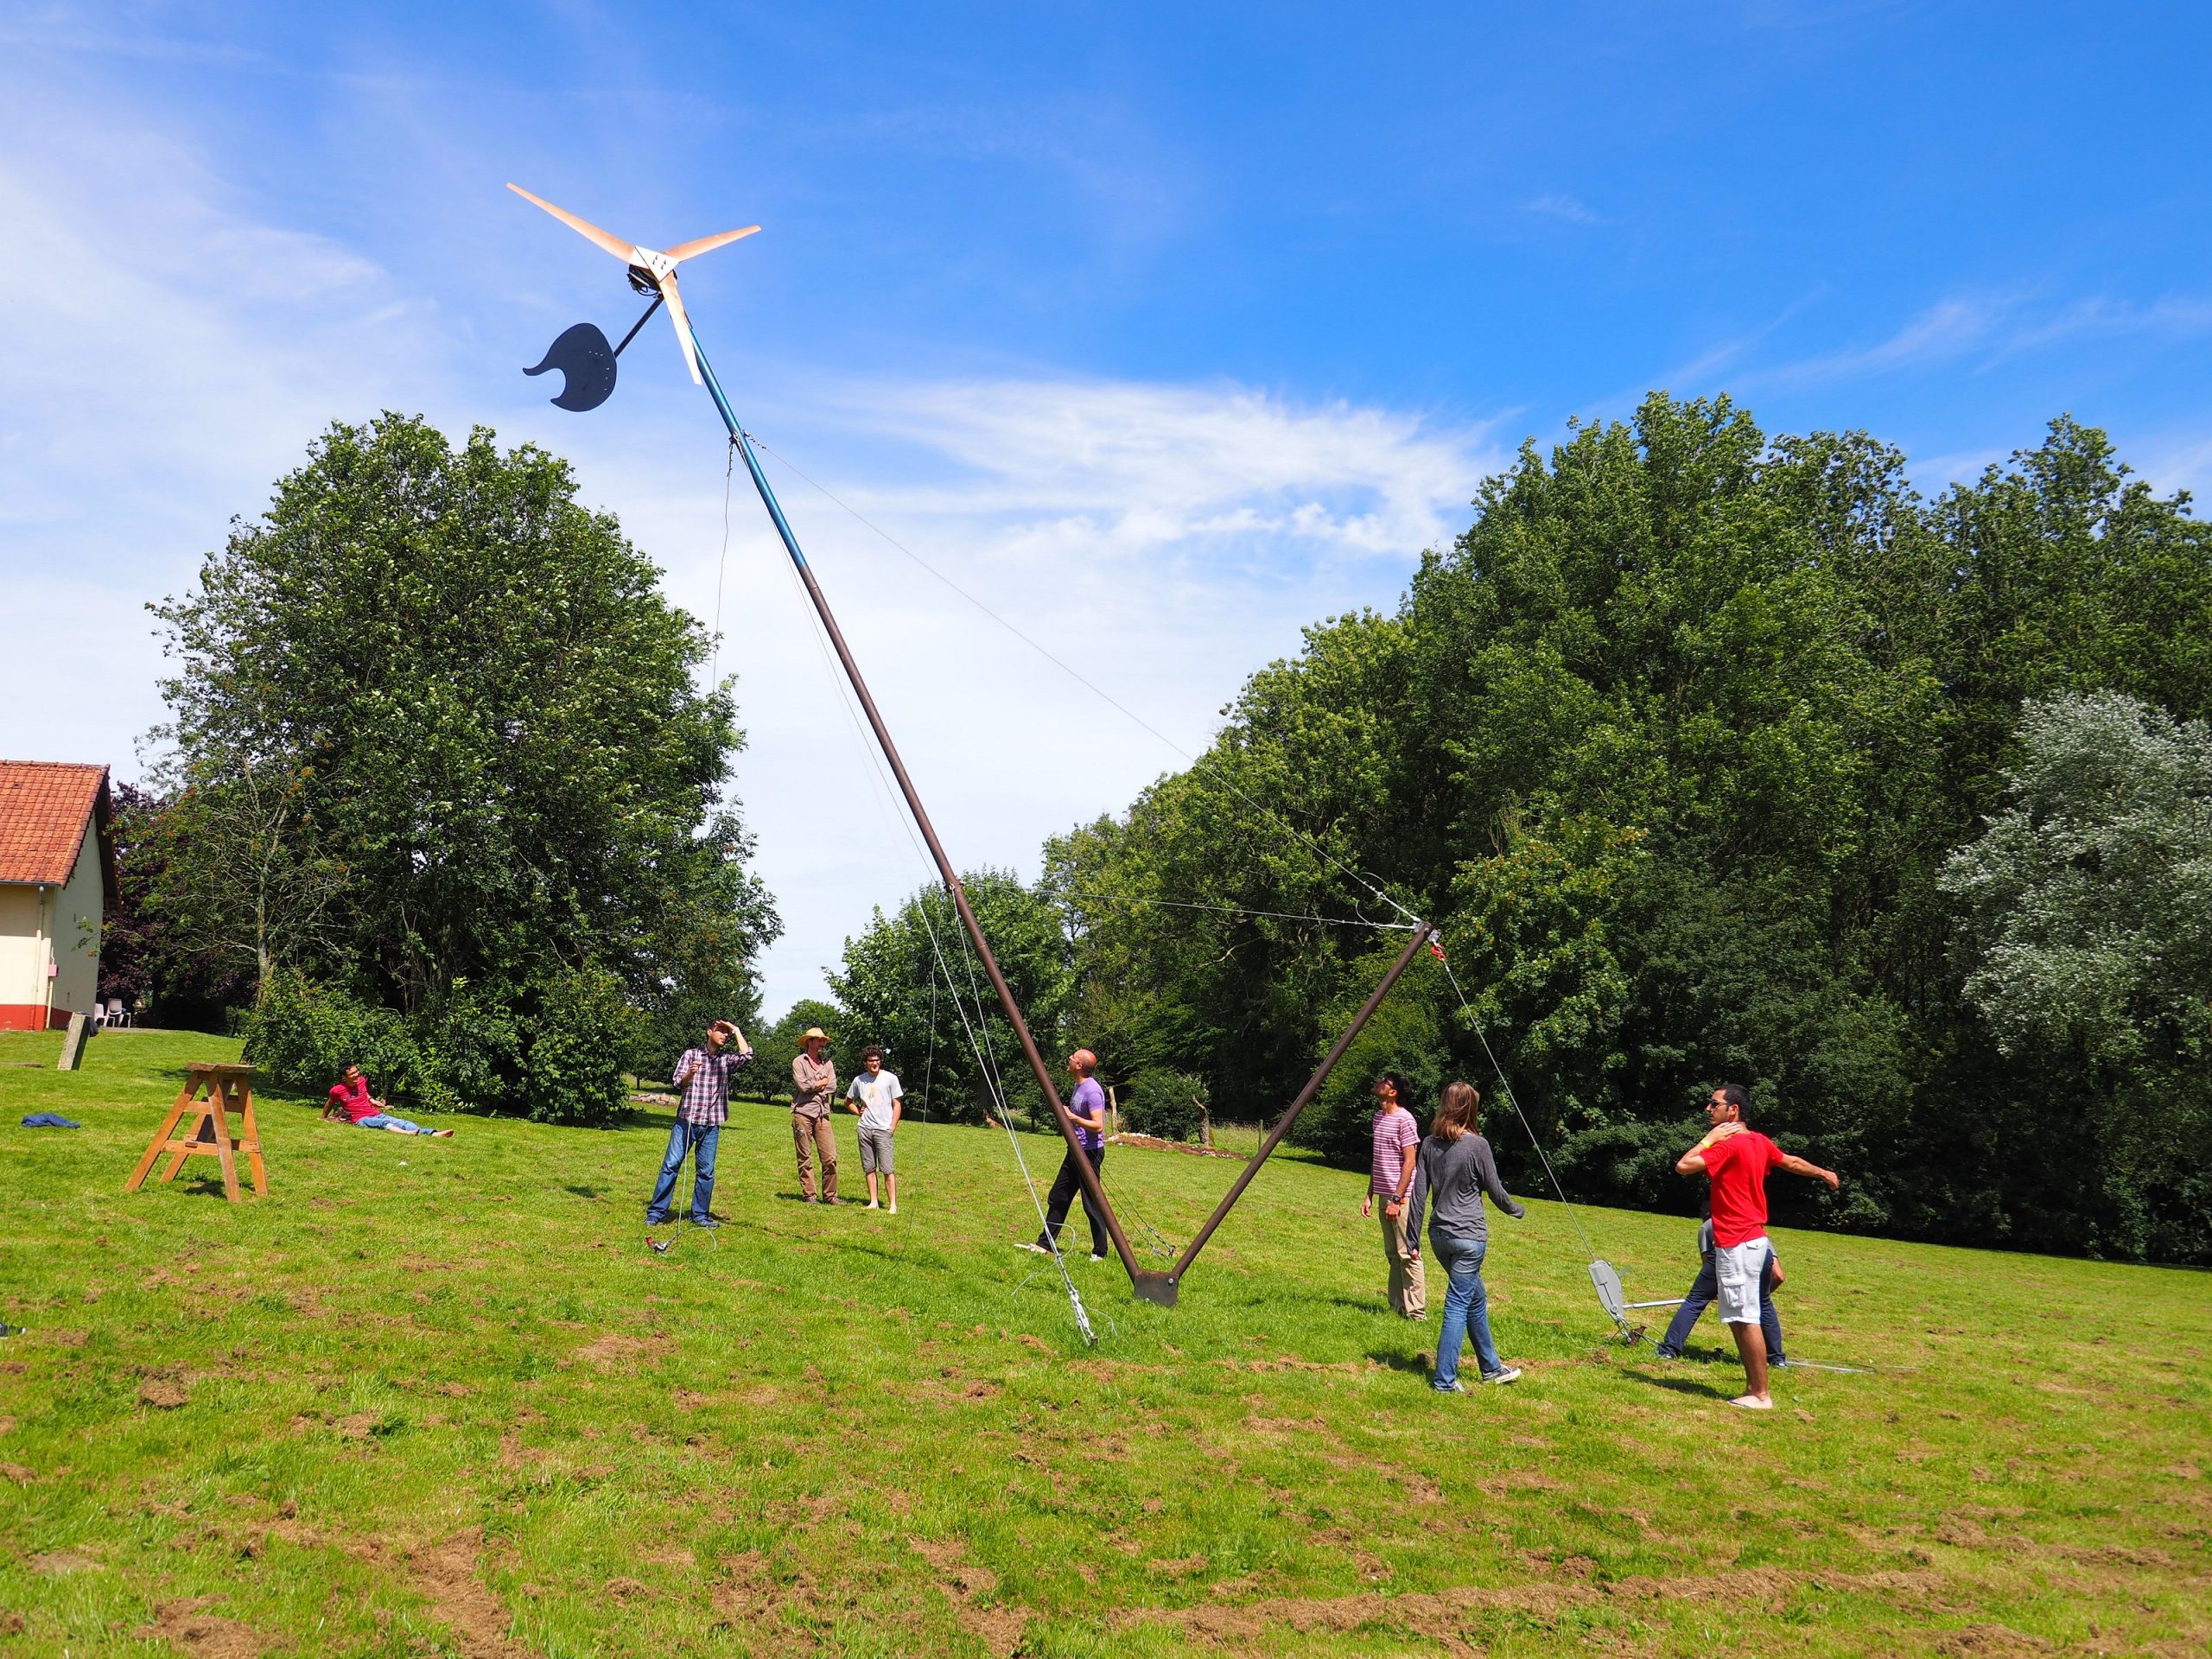
The assembly was put on top of a mast and hoisted up into the air. The electronic inverter was connected. It converts the irregular AC from the generator into DC and from DC into 50 Hz and 230 Volts. A shunt resistor was connected to shed excess power and to protect the electronics.
 Back home
Back home
Back home
The Energy Club students will proudly show their result during the introduction weeks. Talks are ongoing to find a suitable permanent location for the DIY turbine. The Energy Club wants to take perform the half-yearly maintenance by involving other interested students in the process.
Do you have a question or comment about this article?
delta@tudelft.nl
Comments are closed.